
Team Members
View and Manage Members
Administrator can view all team members and their account information on the Team Members page.
To access Team Members:
- Log in to the ZOLOZ Portal using an administrator account.
- In the left navigation bar, select Team > Team Members
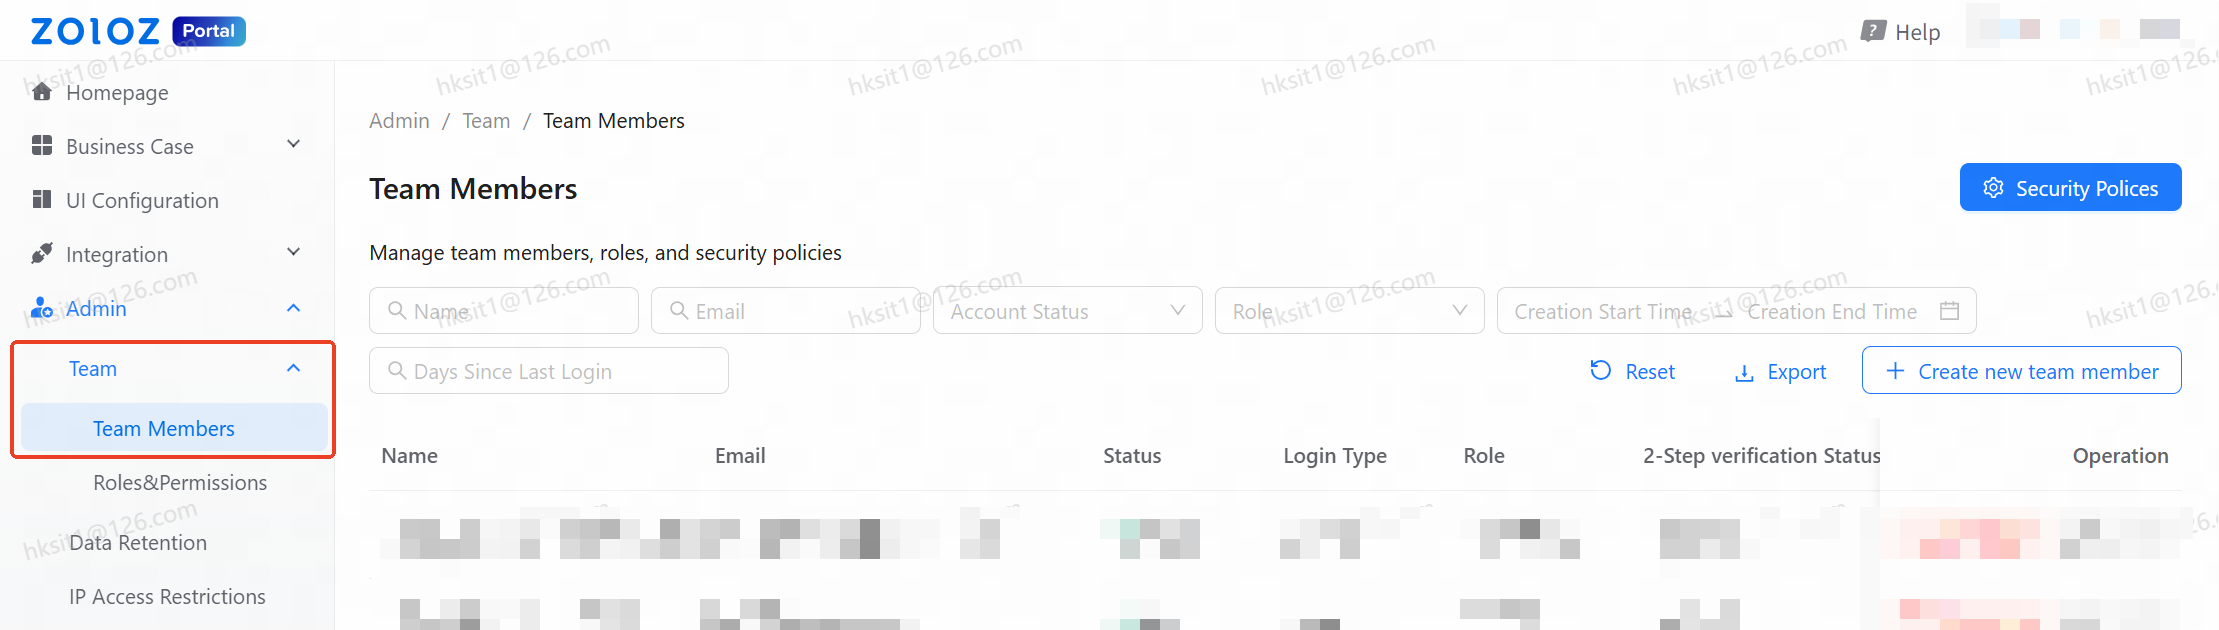
The Team Members list displays the following information:
Column | Description |
Name | Username of the team member |
Email address associated with the account | |
Role | Role(s) assigned to the member (supports multiple roles) |
Status | Account status: Active, Disabled, or Deleted |
Creation Time | When the account was created |
Last Login Time | Most recent login timestamp |
Login Type | Normal (username/password) or SSO |
Actions | Available operations: Edit, Delete, Reset Password, Degrade, Activate/Deactivate |
Available Operations:
- Search — Filter members by name or email
- Filter by Role — Show only members with specific roles
- Export — Export member list to local file
- Create new team member — Add a new team member
Create a Team Member
👤 Who can do this: Only Administrator can create accounts with different roles according to business scenarios.
To create a new team member:
- In the left navigation bar, select Team > Team Members
- Click Create new team member

- Configure the following information:
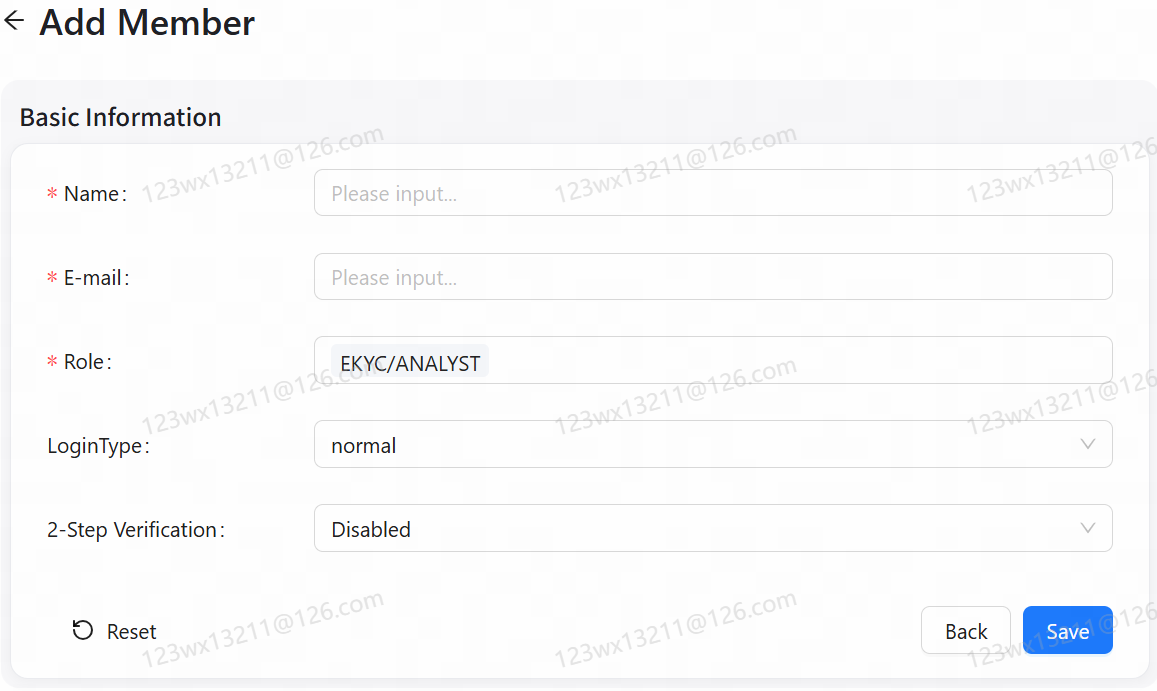
Field | Description | Required |
Name | Username, custom settings (2-50 characters) | ✅ |
The email address associated with the account. The password will be sent to this email address. | ✅ | |
Role | Select one or more roles from the dropdown list. Multiple roles will have permissions combined (union). | ✅ |
Login Type | Select the account type: | ✅ |
2-Step Verification | Choose whether to enable two-step verification. When enabled, users must perform both password verification and Authenticator authentication. | ❌ |
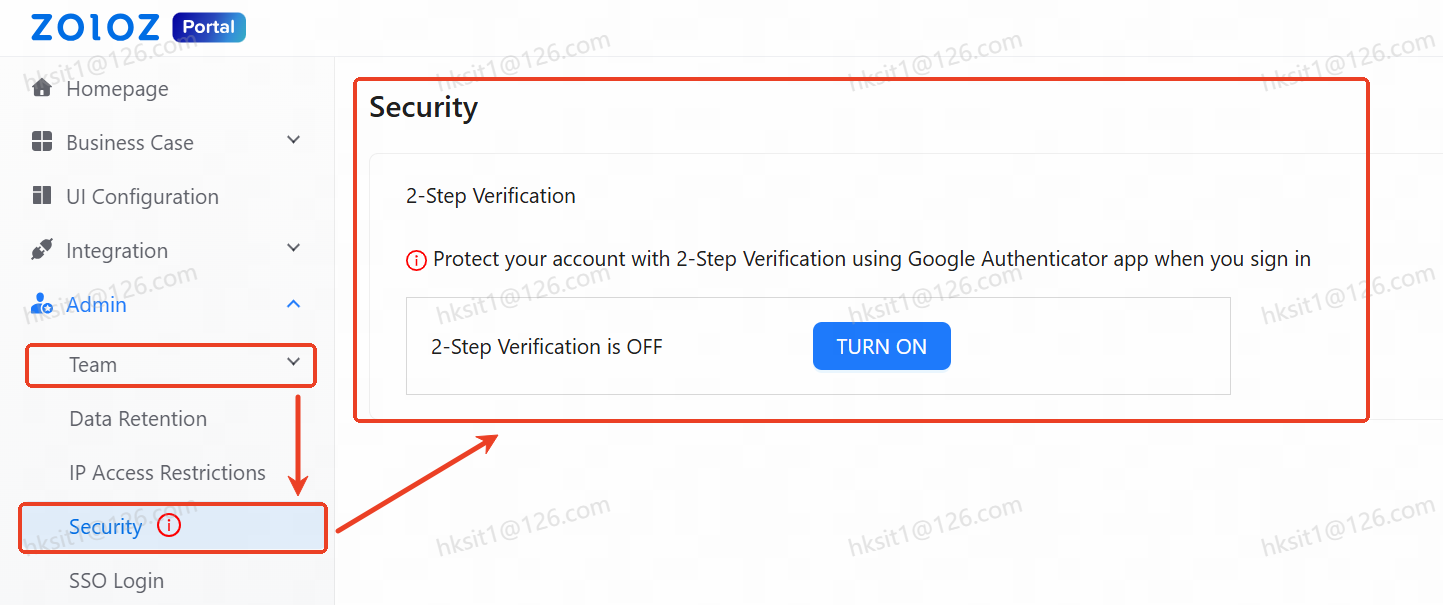
- Click Save to create the account
After successful creation, the new member will receive an email with login credentials (for Normal login type).
Edit a Team Member
👤 Who can do this: Only Administrator can edit team members:
- In the Team Members list, find the member you want to edit
- Click Edit in the Actions column

- You can modify:
- Name — Update the username
- Role — Add or remove roles (permissions will be recalculated based on role union)
- 2-Step Verification — Enable or disable two-step verification
- Status — Activate or deactivate the account
- Click Save to apply changes
📘 Note: Role changes take effect immediately. The affected user needs to log out and log back in to see permission changes.
Delete a Team Member
👤 Who can do this: Only Administrator can delete team members:
- In the Team Members list, find the member you want to delete
- Click Delete Member in the Actions column

- Confirm the deletion in the popup dialog
📘 Note: Deleted accounts are soft-deleted (marked as "Deleted" status) and cannot log in to the system.
Member Status Management
Status | Description | Action |
Active | Account is active and can log in | Click Deactivate to disable |
Disabled | Account is disabled and cannot log in | Click Activate to enable |
Deleted | Account has been deleted | Cannot be restored through UI |