Load UI Configuration Files for Business Scenarios Automatically
This document uses RealID as an example to demonstrate how to automatically load UI configuration files for two different business scenarios under the same account.
Android SDK
Step 1: Configure UI and Export Configuration File
- Log in to ZOLOZ Portal.
The ZOLOZ Portal address varies by site and environment. Select the login address based on your site and environment requirements. For details, refer to the Understand environments and service endpoints. - Navigate to the UI Configuration page and configure the UI based on actual business needs.
- Select "Native SDK" for Scene types.
- Select "RealID" for Product types.
- Customize language, document type, title bar color, title bar text color and other settings according to actual business needs.
- After completing the UI configuration, click "Export" to export the configuration file to your local system.
If your business involves multiple scenarios and requires different UI configurations, you can repeat the above steps to configure and export the corresponding UI configuration files for each scenario.
Step 2: Import Configuration File into Android Project and Invoke ZOLOZ
- Rename Configuration Files
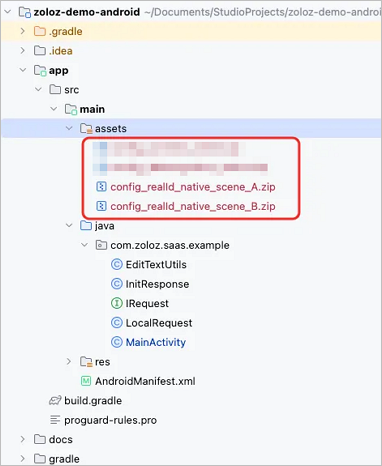
Rename the exported configuration files. In this example, rename them toconfig_realId_native_scene_A.zipandconfig_realId_native_scene_B.zip. - Add the Renamed Configuration Files to the Assets Directory of the App Module.
The path isapp/src/main/assets.
- Write Code to Automatically Load the Appropriate UI Configuration File for Different Business Scenarios.
Below is example code. Note that you need to implement the methodsisRealIdProductSceneA()andisRealIdProductSceneB()based on your actual business requirements.
copy
public void startZoloz(View view) {
    // ...
    final ZLZFacade zlzFacade = ZLZFacade.getInstance();
    final ZLZRequest request = new ZLZRequest();
    request.zlzConfig = initResponse.clientCfg;
    request.bizConfig.put(ZLZConstants.CONTEXT, MainActivity.this);
    request.bizConfig.put(ZLZConstants.LOCALE, "en");

    if (isRealIdProductSceneA()) {
        request.bizConfig.put(ZLZConstants.CHAMELEON_CONFIG_PATH, "config_realId_native_scene_A.zip");
    } else if (isRealIdProductSceneB()) {
        request.bizConfig.put(ZLZConstants.CHAMELEON_CONFIG_PATH, "config_realId_native_scene_B.zip");
    }
    zlzFacade.start(request, new IZLZCallback() {
                            @Override
                            public void onCompleted(ZLZResponse response) {
                                checkResult(initResponse.transactionId);
                            }
                            @Override
                            public void onInterrupted(ZLZResponse response) {
                                showResponse(initResponse.transactionId, JSON.toJSONString(response));
                                Toast.makeText(MainActivity.this, "interrupted", Toast.LENGTH_SHORT).show();
                            }
                        });
}
iOS SDK
Step 1: Configure UI and Export Configuration File
- Log in to ZOLOZ Portal.
The ZOLOZ Portal address varies by site and environment. Select the login address based on your site and environment requirements. For details, refer to the Understand environments and service endpoints. - Navigate to the UI Configuration page and configure the UI based on actual business needs.
- Select "Native SDK" for Scene types.
- Select "RealID" for Product types.
- Customize language, document type, title bar color, title bar text color and other settings according to actual business needs.
- After completing the UI configuration, click "Export" to export the configuration file to your local system.
If your business involves multiple scenarios and requires different UI configurations, you can repeat the above steps to configure and export the corresponding UI configuration files for each scenario.
Step 2: Integrate Configuration Files into the Project
- Rename Configuration Files.
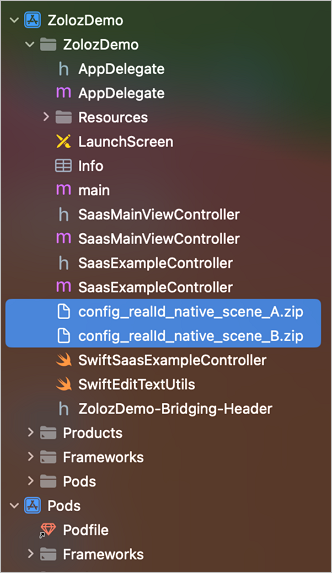
Rename the exported configuration files. In this example, rename them toconfig_realId_native_scene_A.zipandconfig_realId_native_scene_B.zip. - Integrate Configuration Files into the Project.
Copy the renamed configuration files into your project directory and ensure they are correctly referenced.
- Verify Accessibility of Configuration Files.
Write test code in your main project to confirm the configuration files can be accessed properly. Below is example code:
copy
NSString* pathA = [[NSBundle mainBundle] pathForResource:@"config_realId_native_scene_A" ofType:@"zip"];
NSLog(@"resource_SceneA_%@",pathA);
NSString* pathB = [[NSBundle mainBundle] pathForResource:@"config_realId_native_scene_B" ofType:@"zip"];
NSLog(@"resource_SceneB_%@",pathB);
Step 3: Invoke ZOLOZ
- Create a
bizConfigand Set Language and Configuration File Path.
In this example, set the language to English. Loadconfig_realId_native_scene_A.zipwhen the business scenario isSCENE_A; otherwise, loadconfig_realId_native_scene_B.zip. Below is the example code:
copy
//Create bizConfig dictionary
NSMutableDictionary *bizConfig = [NSMutableDictionary dictionary];
//Set the current view controller
[bizConfig setObject:self forKey:kZLZCurrentViewControllerKey];
//Set language
[bizConfig setValue:@"zh-en" forKey:kZLZLocaleKey];
//Set public key
if ([data objectForKey:@"rsaPubKey"]) {
    [bizConfig setObject:[data objectForKey:@"rsaPubKey"] forKey:kZLZPubkey];
}
//Set configuration file paths
NSString* pathA = [[NSBundle mainBundle] pathForResource:@"config_realId_native_scene_A" ofType:@"zip"];
NSLog(@"resource_SceneA_%@",pathA);
NSString* pathB = [[NSBundle mainBundle] pathForResource:@"config_realId_native_scene_B" ofType:@"zip"];
NSLog(@"resource_SceneB_%@",pathB);
//Load the appropriate configuration file based on the business scenario
if(SCENE_A)
{
    [bizConfig setObject:pathA forKey:kZLZChameleonConfigKey];
}
else
{
    [bizConfig setObject:pathB forKey:kZLZChameleonConfigKey];
}- Create a ZLZRequest Instance and Initiate Authentication.
UseclientCfgandbizConfigto create aZLZRequestinstance and initiate the authentication request. Below is the complete example code:
copy
NSMutableDictionary *bizConfig = [NSMutableDictionary dictionary];
//Set the current view controller
[bizConfig setObject:self forKey:kZLZCurrentViewControllerKey];
//Set language
[bizConfig setValue:@"zh-en" forKey:kZLZLocaleKey];
//Set public key
if ([data objectForKey:@"rsaPubKey"]) {
    [bizConfig setObject:[data objectForKey:@"rsaPubKey"] forKey:kZLZPubkey];
}
//Set configuration file paths
NSString* pathA = [[NSBundle mainBundle] pathForResource:@"config_realId_native_scene_A" ofType:@"zip"];
NSLog(@"resource_SceneA_%@",pathA);
NSString* pathB = [[NSBundle mainBundle] pathForResource:@"config_realId_native_scene_B" ofType:@"zip"];
NSLog(@"resource_SceneB_%@",pathB);
if(SCENE_A)
{
    [bizConfig setObject:pathA forKey:kZLZChameleonConfigKey];
}
else
{
    [bizConfig setObject:pathB forKey:kZLZChameleonConfigKey];
}
NSString *clientConfig = [data objectForKey:@"clientCfg"];
NSString *transactionId = [data objectForKey:@"transactionId"];
NSLog(@"transactionId_%@",transactionId);
//Create ZLZRequest instance
ZLZRequest *request = [[ZLZRequest alloc] initWithzlzConfig:clientConfig bizConfig:bizConfig];
[[ZLZFacade sharedInstance] startWithRequest:request completeCallback:^(ZLZResponse * response) {
    dispatch_async(dispatch_get_main_queue(), ^{
        [self checkResultWithId:transactionId];
    });
    } interruptCallback:^(ZLZResponse * response) {
    [self simpleAlertWithTitle:@"interrupt" andMessage:[NSString stringWithFormat:@"retcode:%@,extinfo:%@",response.retcode,response.extInfo]];
    }];
Web SDK
Step 1: Configure UI and Export Configuration File
- Log in to ZOLOZ Portal.
The ZOLOZ Portal address varies by site and environment. Select the login address based on your site and environment requirements. For details, refer to the Understand environments and service endpoints. - Navigate to the UI Configuration page and configure the UI based on actual business needs.
- Select "Web SDK" for Scene types.
- Select "RealID" for Product types.
- Customize language, document type, title bar color, title bar text color and other settings according to actual business needs.
- After completing the UI configuration, click "Export" to export the configuration file to your local system.
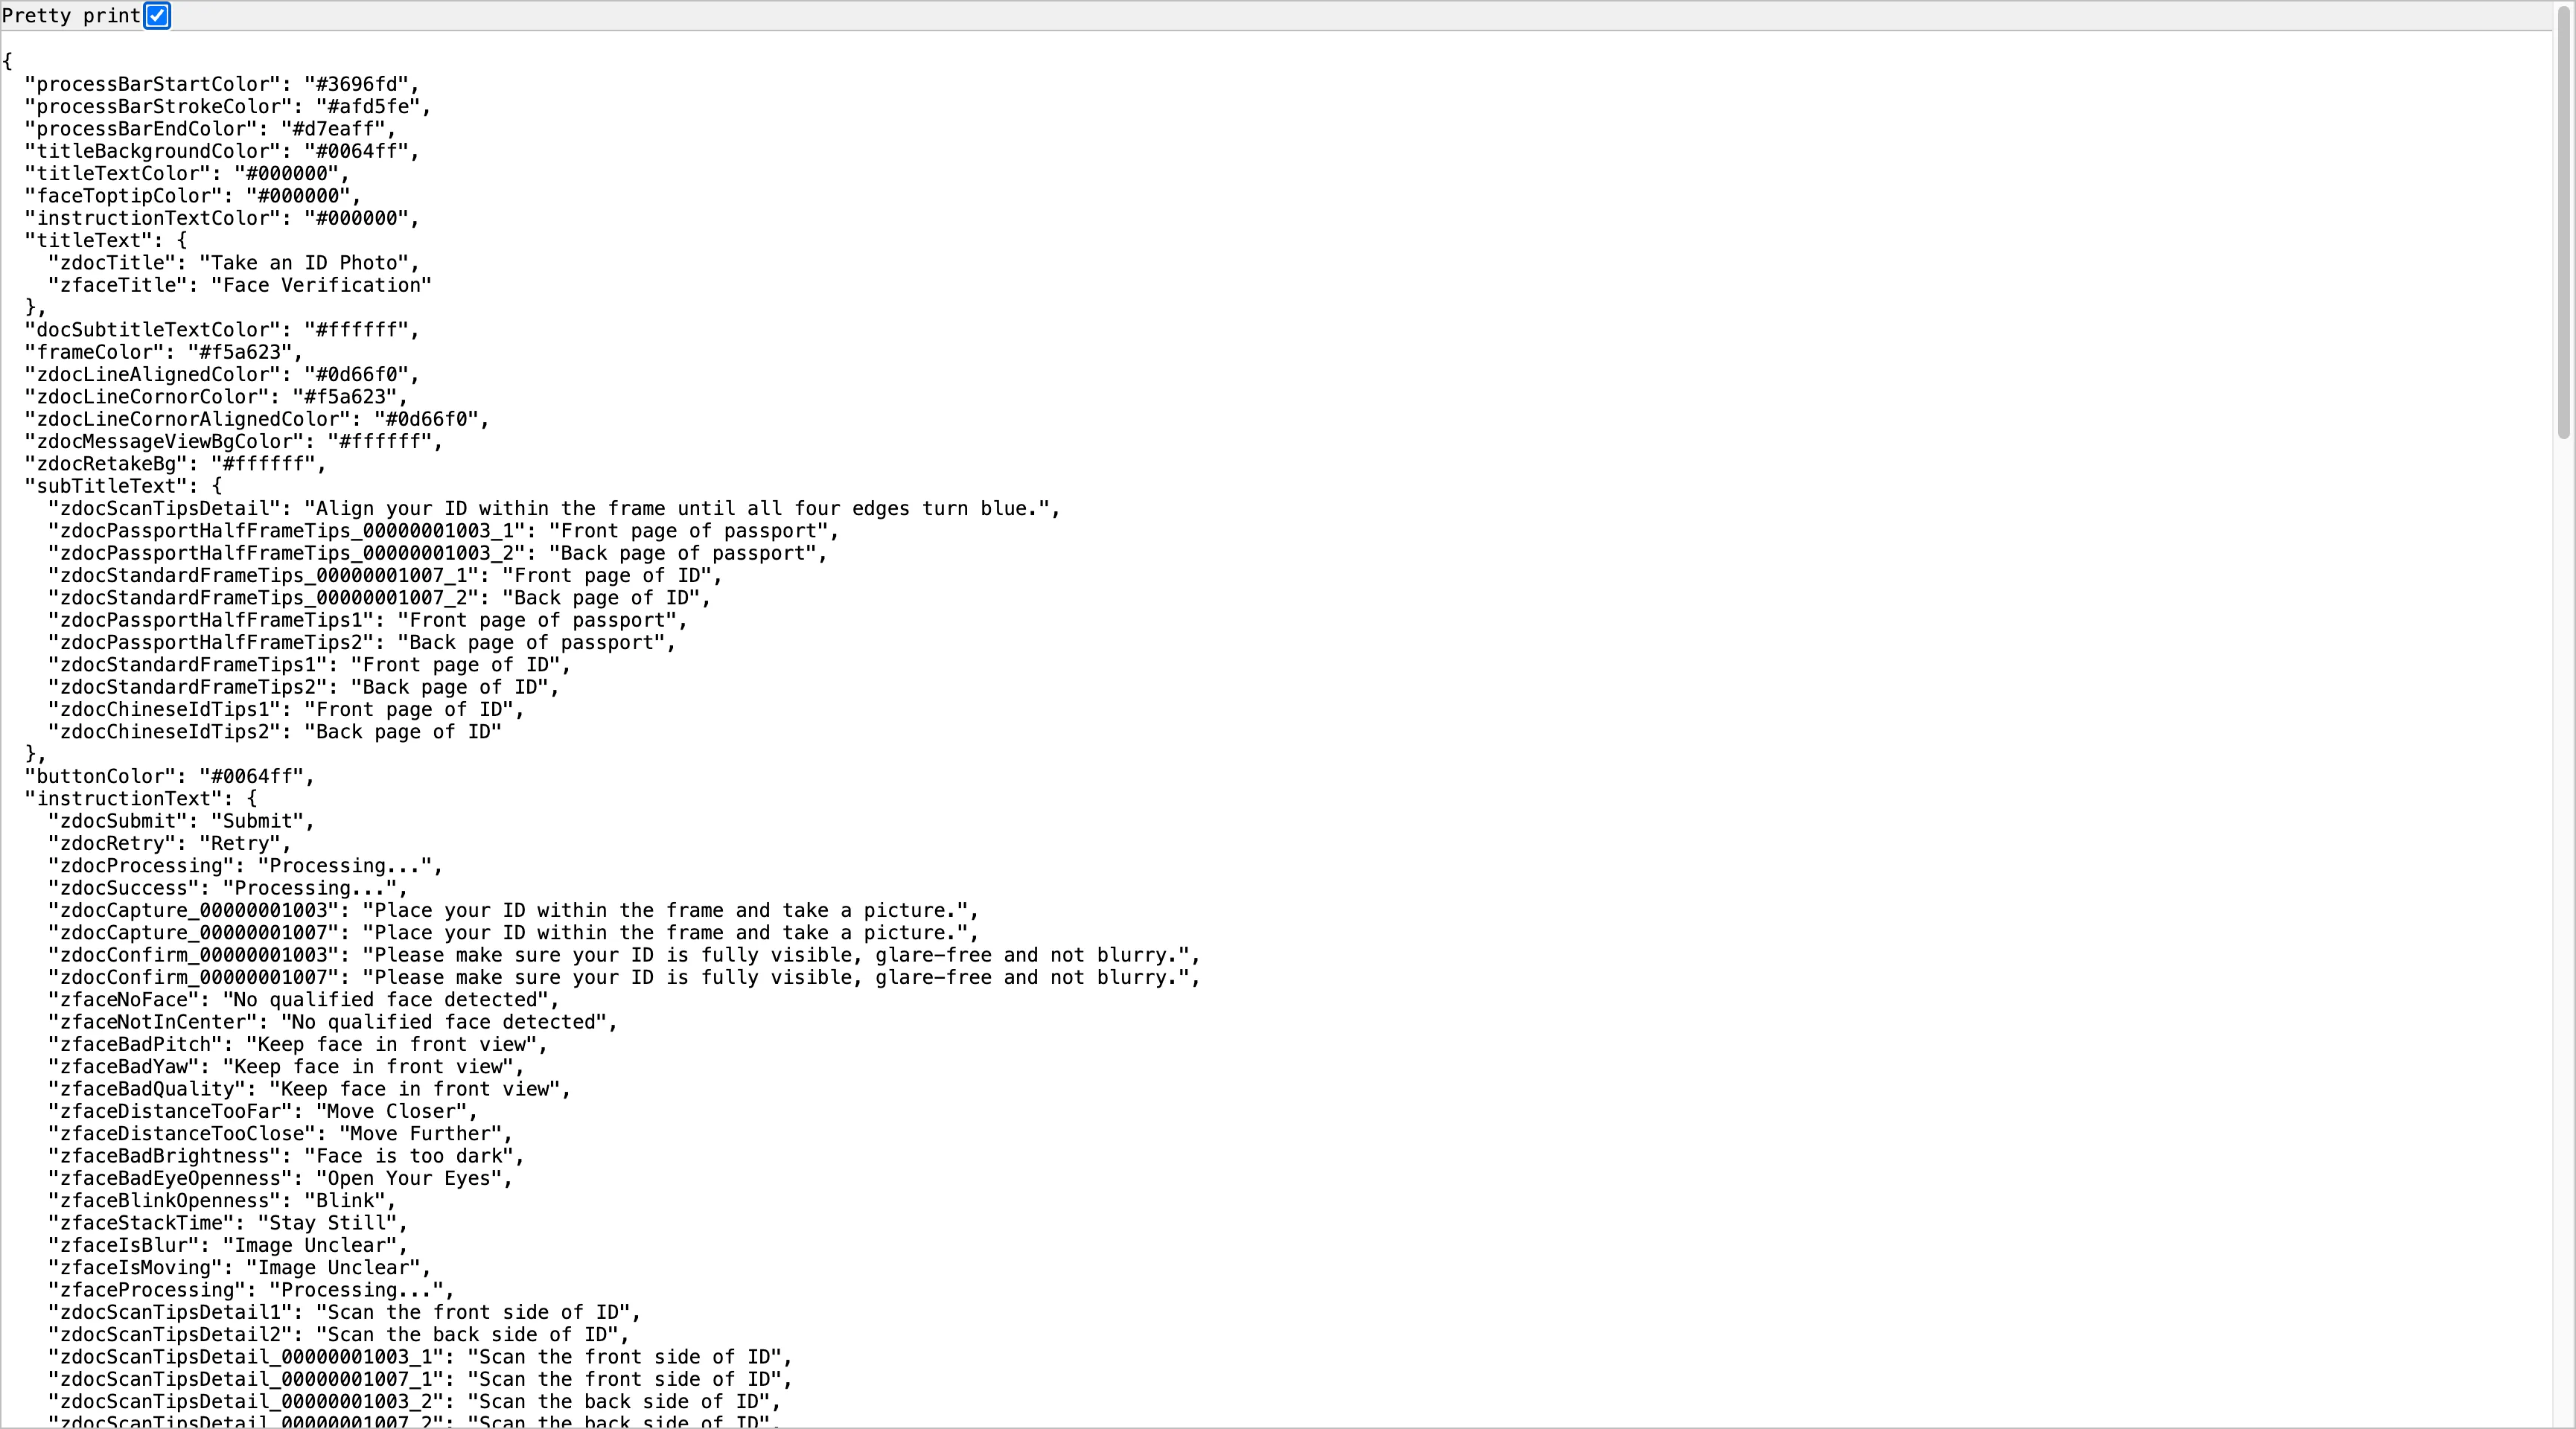
If your business involves multiple scenarios and requires different UI configurations, you can repeat the above steps to configure and export the corresponding UI configuration files for each scenario. The configuration files exported by the Web SDK include the following two items:
- ZIP File: This is used to restore the configuration after importing on the UI Configuration page in ZOLOZ Portal.
- JSON File: This file is used to configure the SDK. You need to upload this file to your server and configure it as the
langPackparameter.
Step 2: Store Configuration Files and Verify
The Web SDK customizes the UI by passing different langPack paths, enabling automatic loading of the appropriate UI configuration files for various business scenarios. Follow these steps for implementation:
- Rename Configuration Files.
Rename the exported configuration files. In this example, rename them toscene_A.zipandscene_B.zip. - Store UI Configuration Files and Verify.
- Store the renamed configuration files in different paths according to business scenarios, such as on a CDN or network storage, and ensure that access permissions are open to the ZOLOZ Web SDK domain. After successful storage, your storage space should have the following directory structure:
copy
/zoloz-langPack
/scene_A.js
/scene_B.js- Verify Accessibility of Configuration Files.Enter the file's path in the browser's address bar to test if it can be accessed normally, confirming its accessibility.

Step 3: Automatically Load UI Configuration Files
Below is an example code demonstrating how to automatically load the appropriate UI configuration files based on different business scenarios:
copy
// Scene configuration table
const sceneConfig = {
  default: '/zoloz-langPack/default.json',  // Default
  sceneA: '/zoloz-langPack/sceneA.json',   // Scene A
  sceneB: '/zoloz-langPack/sceneB.json'    // Scene B
    // Extendable to Other Scenes
}
// Retrieve Web SDK URL for the corresponding scene
function getWebSdkUrl(scene = 'default') {
  const langPack = sceneConfig[scene] || sceneConfig.default;
  return `${realidUrl}?clientcfg=${encodeURIComponent(clientCfg)}&langPack=${encodeURIComponent(langPack)}`;
}
// Example usage
const webSdkUrl = getWebSdkUrl('sceneA');  // Pass in the current scene name

