Role Management
To achieve granular permission management, administrators can flexibly create roles based on business needs, assign different permissions, and allocate roles to the appropriate personnel.
Initialization roles
The system provides predefined roles to simplify permission management. It creates these roles during system initialization.
The AML administrator can modify role permissions or delete roles in the Role Management page based on business needs.
The system provides the following initialization roles:
Role name | Associated modules | Permission description |
DEFAULT-AML-ADMIN | Portal | Have all permissions in ZOLOZ AML Portal, including account management: create users, assign roles, reset passwords. |
Screening Admin | NSS | Have all permissions of the List Screening operator, including configuring screening scenarios, list groups, and all List Screening settings modules. |
Screening Operator | NSS | View and process list screening tasks, and run one-time screening. |
CRR Admin | CRR | Have all permissions of the CRR (Customer Risk Rating) operator, including configuring continuous rating models, real-time models, and all CRR settings modules. |
CRR Operator | CRR | View and process EDD (Enhanced Due Diligence) tasks. |
TMS Admin | TMS | Have all permissions of the TMS (Transaction Monitoring System) operator, including configuring offline models and all TMS settings modules. |
TMS Operator | TMS | View and process TMS alerts and cases. |
Adding Roles and Assigning Permissions
- Log in to the ZOLOZ Portal using an administrator account.
- Navigate to the configuration section by selecting Admin > Role Management in the left navigation bar.
- Add roles and permissions.
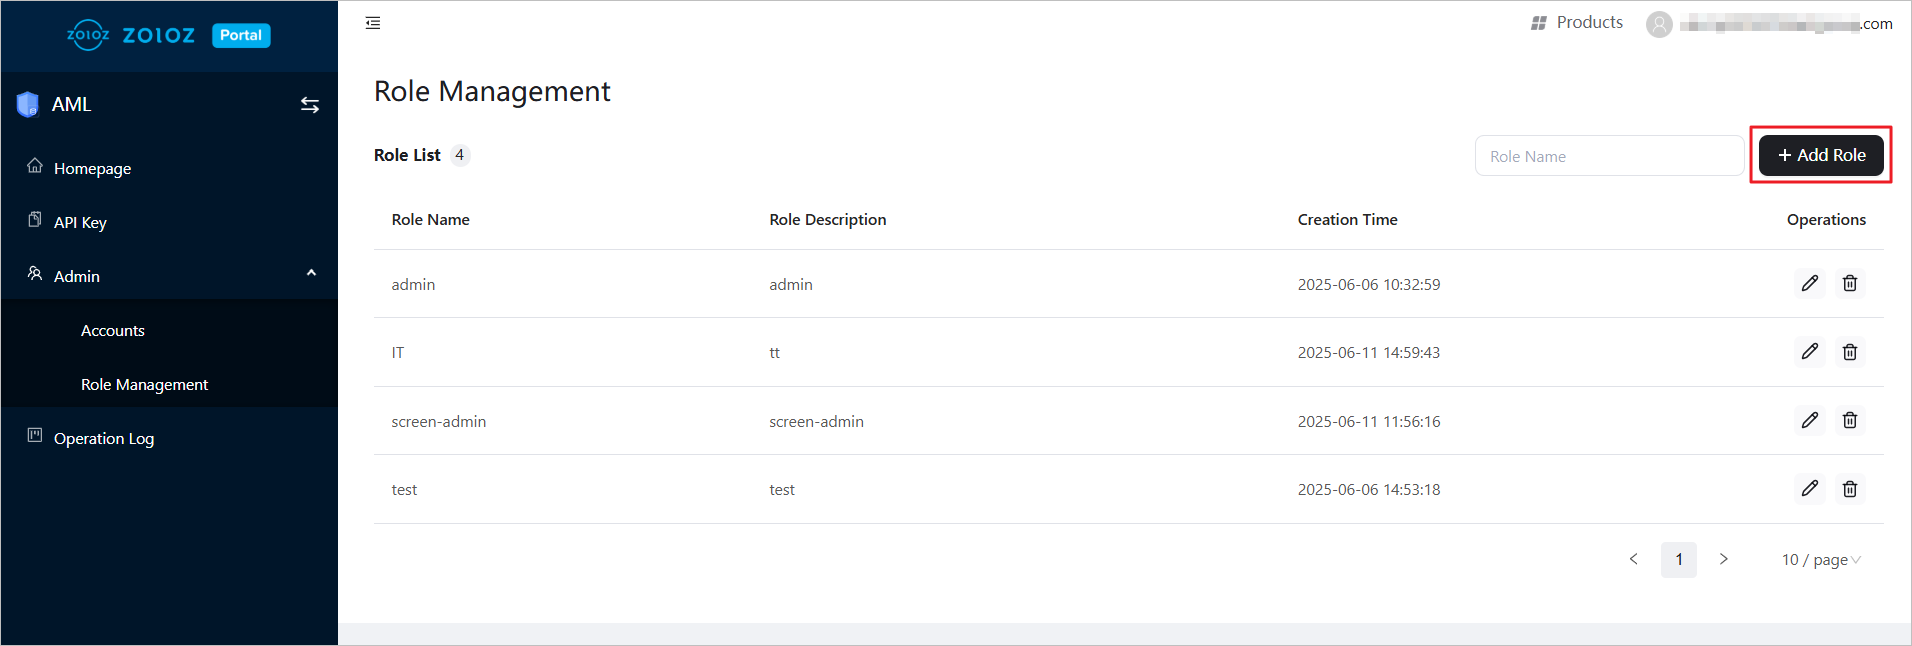
- On the Role Management page, click "Add Role" to create a new role.

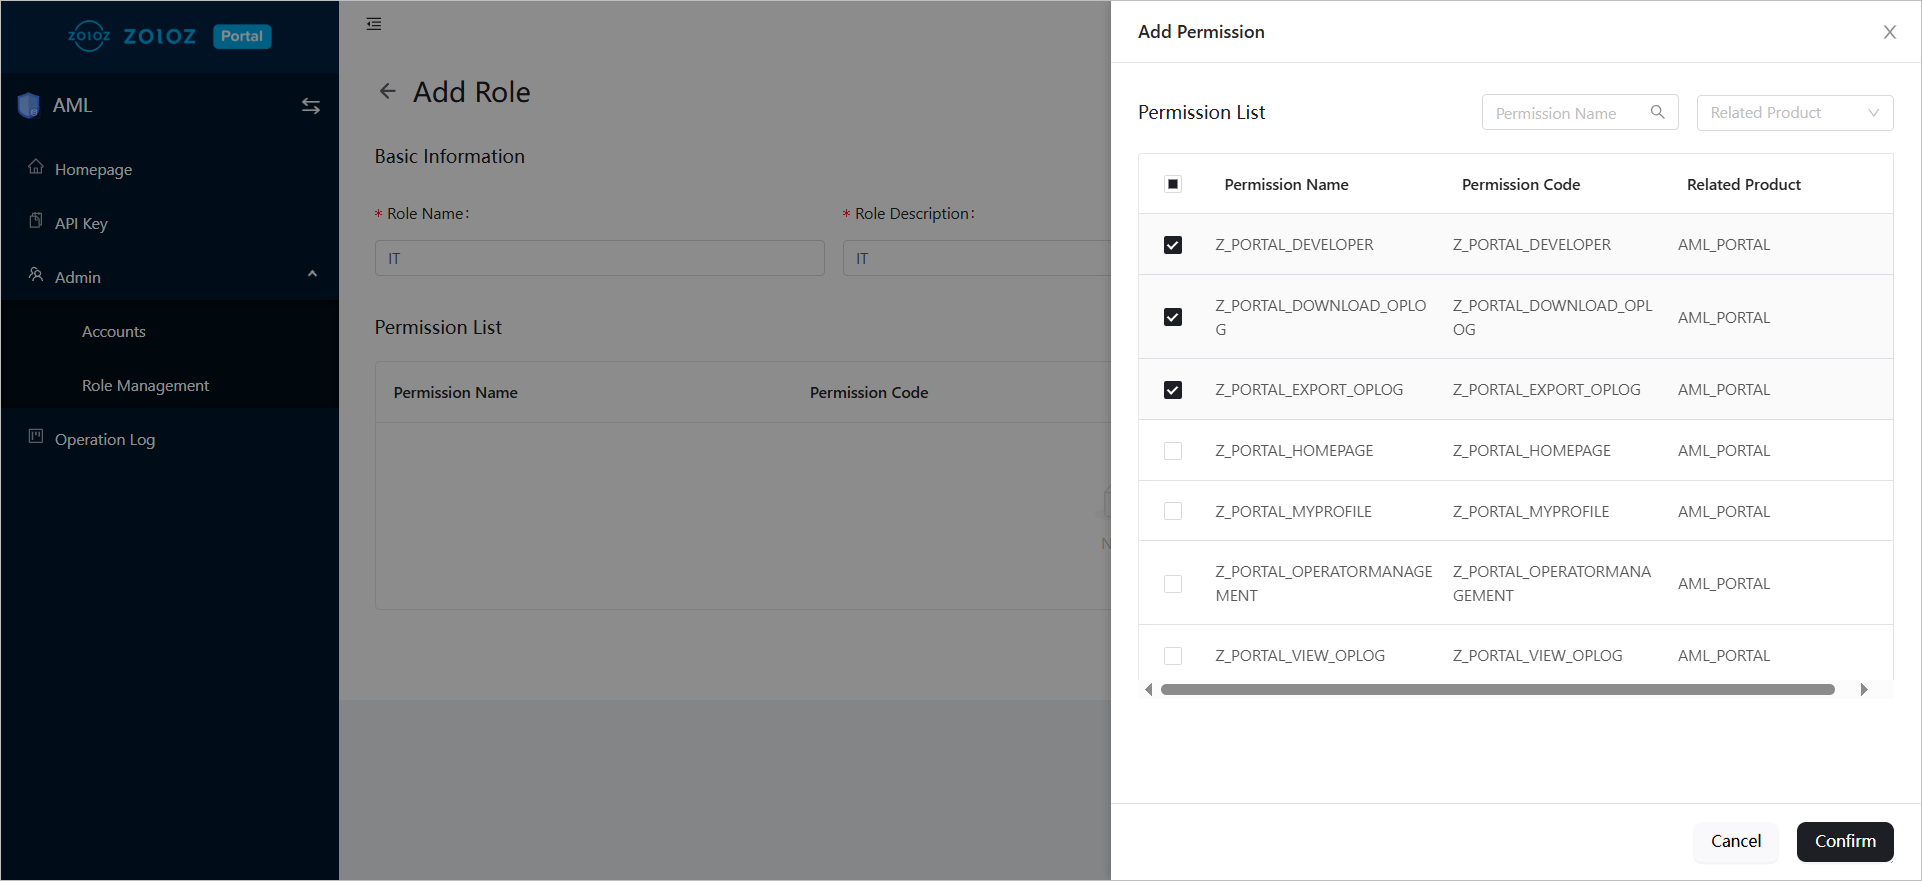
You can customize the Role Name and Role Description, for example, you might set the Role Name to "IT". - Click "Add Permission" to assign the appropriate permissions to the role.

- After adding permissions, click "Confirm".
- Finally, click "Submit" to complete the addition of the role and permissions.
- Add Members.
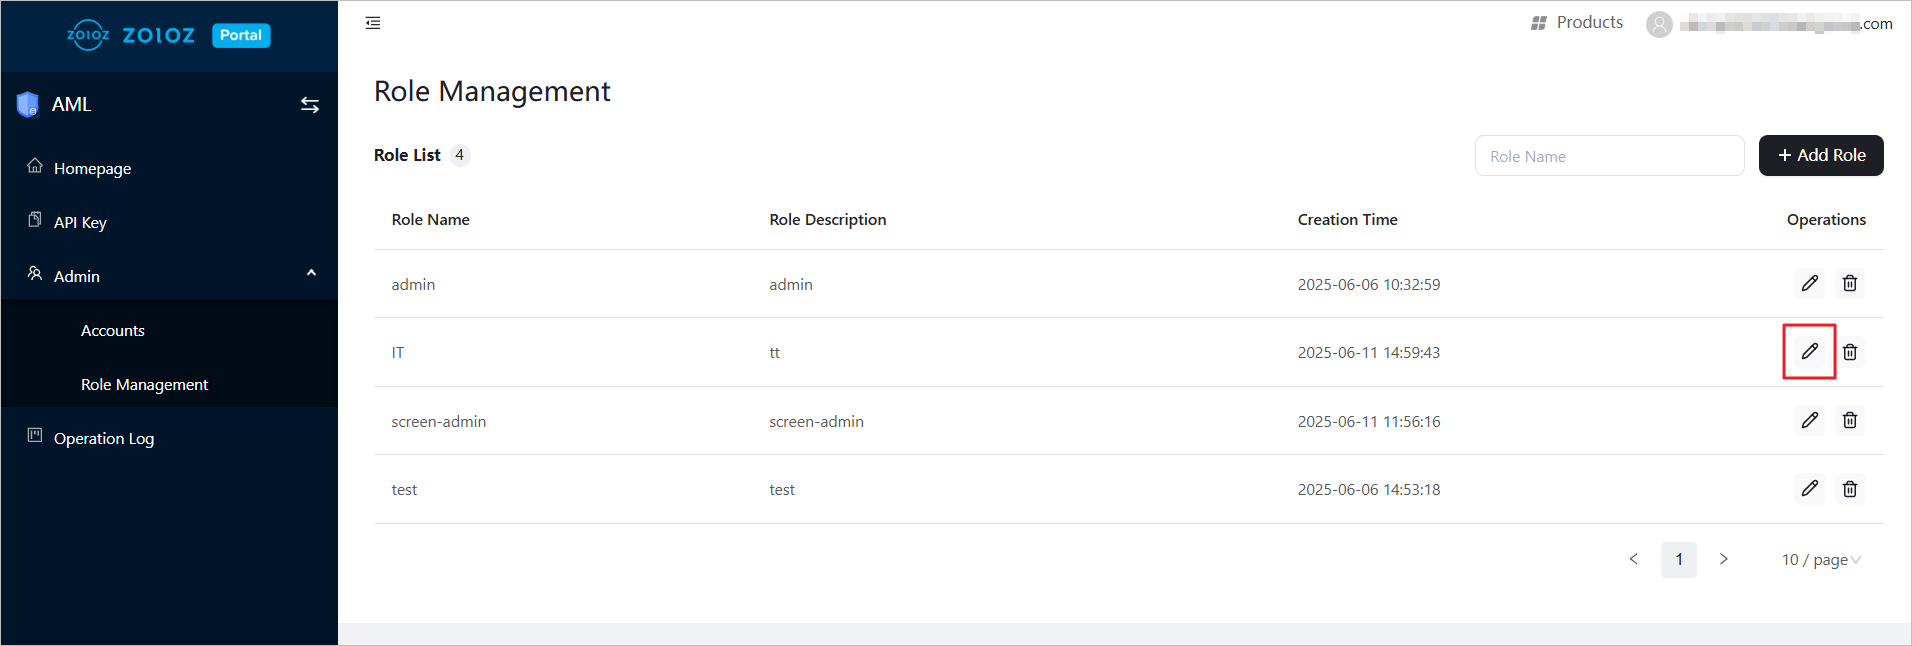
- On the Role Management page, click the edit icon next to the specified role.

- In the role's edit page, click "Edit".
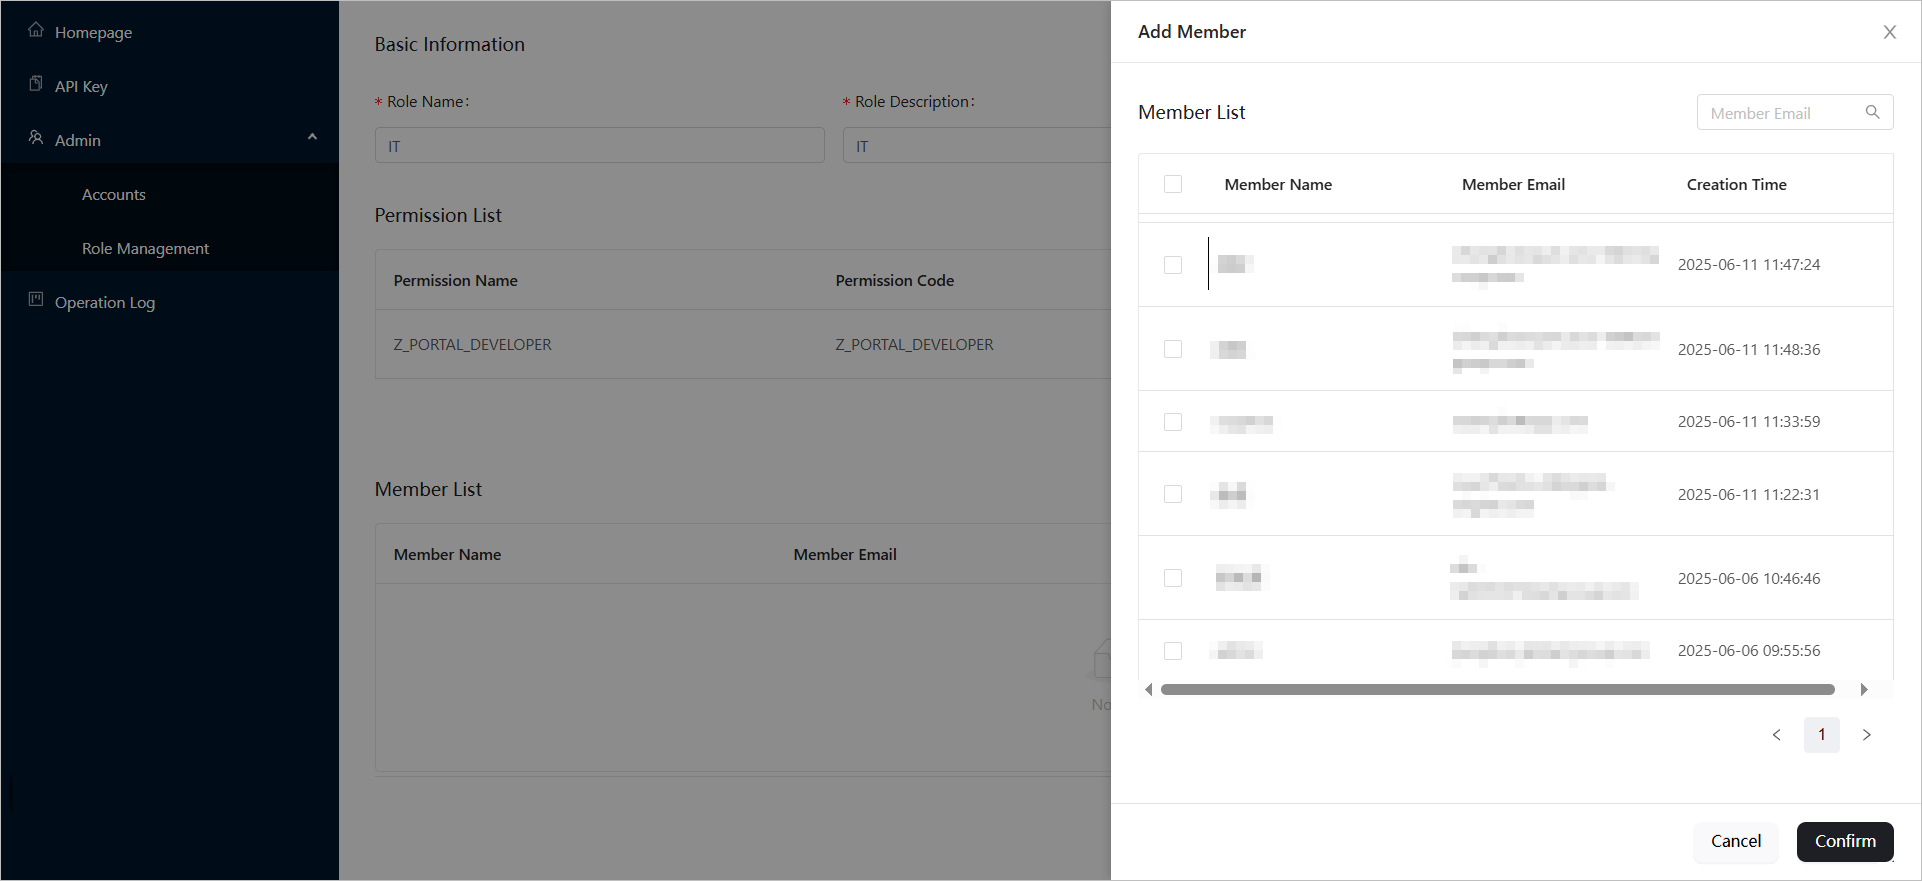
- Click "Add Member" to assign members to the role. If the member list is empty, create sub-accounts first by selecting Admin > Accounts.

- After adding members, click "Confirm" to complete the configuration.
View Role List
On the Role Management page, you can view the list of all roles.
Modify Role Information
On the Role Management page, click the edit icon next to a specific role to access its edit page. From there, you can:
- Modify role information
- Add or remove permissions
- Add or remove members
Delete Role
On the Role Management page, click "Delete" icon to remove that role.


